In my last post I mentioned we uncovered a water leak and some rotted wood during our demo of the laundry area and kitchenette. Since this is only one of the many problems we discovered we are going to TRY to tackle one problem at a time!
Showing posts with label Projects. Show all posts
Showing posts with label Projects. Show all posts
Saturday, May 5, 2012

Monday, April 16, 2012
Rain, Rain Go Away!
If anyone tells me we're still in a drought I'm going to happily show them pictures of my kitchen and living room. For what seems like 4 solid weeks we've had at least on good downpour in the middle week. While I'm glad all the rain comes in the middle of the week, I was not glad to get this text message from my husband, "Was there water all over the kitchen and den floor earlier?" Followed up with these pictures...


I know it's hard to see the water all over the floor here but trust me, it was there.
Of course had not seen the water before I left for work but to be honest I didn't walk through the back of the house either. Regardless, we have a serious water leak. We've know for some time that we had a water intrusion along the back wall of the house but we thought it was an isolated issue. We were wrong!
It appears the flashing around our upstairs bathroom was not installed correctly and thus we have a leak from the upstairs bathroom through the ceiling to our kitchenette. I gave my husband the ok to rip out the kitchenette ceiling, about 10 minutes later I get these pictures...


Much to our surprise and excitement we have amazing wood beam ceilings! Once we both got home from work we decided to take out the rest of the ceiling. Lucky for us the next day was trash pick up!
Here's what a night of kitchen demo in our house looks like...


Since the deconstructed is quite popular right now, we are looking into ways to create a seamless transition from the kitchen. While this definitely wasn't top on our project list, it just took over the first spot! Aw, the joys of home ownership!


I know it's hard to see the water all over the floor here but trust me, it was there.
Of course had not seen the water before I left for work but to be honest I didn't walk through the back of the house either. Regardless, we have a serious water leak. We've know for some time that we had a water intrusion along the back wall of the house but we thought it was an isolated issue. We were wrong!
It appears the flashing around our upstairs bathroom was not installed correctly and thus we have a leak from the upstairs bathroom through the ceiling to our kitchenette. I gave my husband the ok to rip out the kitchenette ceiling, about 10 minutes later I get these pictures...


Much to our surprise and excitement we have amazing wood beam ceilings! Once we both got home from work we decided to take out the rest of the ceiling. Lucky for us the next day was trash pick up!
Here's what a night of kitchen demo in our house looks like...


Since the deconstructed is quite popular right now, we are looking into ways to create a seamless transition from the kitchen. While this definitely wasn't top on our project list, it just took over the first spot! Aw, the joys of home ownership!
Saturday, January 28, 2012
Laundry Room Ideas
Since we got a new washer and dryer for Christmas, I've been dreaming about a new laundry room. As I was looking for ideas, I stumbled across this website called Houzz. It's amazing! It has tons of pictures, products, and ideabooks!
Here's been some of my inspiration thus far (courtesy of Houzz)...

My favorite feature of this room is the bar right above the washer and dryer for hanging. It's genius!

I'm totally in LOVE with this - look at all that storage! Ah, love it! Clearly I'm delusional to think this will be MY laundry room but maybe in a few years when I finally hit that big Powerball payday! Hey, a girl can dream, right?
But honestly, here are some ideas I've stumbled upon so far that I think can be incorporated into our limited space.

I like the idea of hiding the laundry room behind a bookcase, it's a really cool concept. The only problem I can see is the hassle of moving the bookcase everytime I go to do laundry. I know it may sound silly but I can't help but think this is a great idea in theory and not in reality.

I love the the use of space here. And since we have limited space it may be a great option!

This room is really the most realistic for us. It's a great use of space, still has storage, and even a small counter for folding clothes or a makeshift desk.

I'm really a fan of the built in look of this washer and dryer, it gives the room a very finished look. The counters and storage also make the room look super functional. If we went with this design we'd have to cut back on the amount of cabinets and storage but I still think we could pull it off.
I never dreamed there could be so many options and ideas! Right now, our laundry area is an extension of our kitchen so I don't want to commit to anything too crazy. Especially if a laundry room remodel would result in having to do a kitchen makeover at the same time. Oh decisions, decisions!
Here's been some of my inspiration thus far (courtesy of Houzz)...
My favorite feature of this room is the bar right above the washer and dryer for hanging. It's genius!
I'm totally in LOVE with this - look at all that storage! Ah, love it! Clearly I'm delusional to think this will be MY laundry room but maybe in a few years when I finally hit that big Powerball payday! Hey, a girl can dream, right?
But honestly, here are some ideas I've stumbled upon so far that I think can be incorporated into our limited space.
I like the idea of hiding the laundry room behind a bookcase, it's a really cool concept. The only problem I can see is the hassle of moving the bookcase everytime I go to do laundry. I know it may sound silly but I can't help but think this is a great idea in theory and not in reality.
I love the the use of space here. And since we have limited space it may be a great option!
This room is really the most realistic for us. It's a great use of space, still has storage, and even a small counter for folding clothes or a makeshift desk.
I'm really a fan of the built in look of this washer and dryer, it gives the room a very finished look. The counters and storage also make the room look super functional. If we went with this design we'd have to cut back on the amount of cabinets and storage but I still think we could pull it off.
I never dreamed there could be so many options and ideas! Right now, our laundry area is an extension of our kitchen so I don't want to commit to anything too crazy. Especially if a laundry room remodel would result in having to do a kitchen makeover at the same time. Oh decisions, decisions!
Monday, November 7, 2011
Oh Monday
My post this morning was going to be able the lack of projects we have right now. I was going to talk about how Brett and I were going to take the holidays to re-group and re-prioritize our projects for 2012. But this morning didn't quite go as planned.
Thanks to daylight savings time I woke up feeling refreshed and ready to take on the day. I was even ready to walk out the door early! I hadn't really had a chance to do laundry this weekend so I figured I throw a load in the washer while I had my coffee. All was good until I walked back into the kitchen to find water streaming out of the bottom of our washer! NOOO!!! First thing I did was yell for Brett, boys are just so helpful sometimes! And to be honest this definitely falls into "Brett Territory."

Thanks to daylight savings time I woke up feeling refreshed and ready to take on the day. I was even ready to walk out the door early! I hadn't really had a chance to do laundry this weekend so I figured I throw a load in the washer while I had my coffee. All was good until I walked back into the kitchen to find water streaming out of the bottom of our washer! NOOO!!! First thing I did was yell for Brett, boys are just so helpful sometimes! And to be honest this definitely falls into "Brett Territory."

How Monday started...
We checked the easy things like the water supply line and the drainage hose - no problems there. So we're pretty sure it is the washer itself. As you can see from the picture, our washer and dryer are circa 1990 so repairing the washer isn't really an option. Looks like we'll be asking Santa for a new washer and dryer for Christmas!
The good news is that we'll be taking on the laundry room renovation earlier than anticipated!
The Plan: Take out the accordion doors, sheet rock the laundry nook and install shelving and some extra storage.
Don't worry, pictures and the play by play coming soon!
Tuesday, November 1, 2011
Surprise, Surprise!
About two weeks ago something awesome happened to our neighbors house, they decided to tear down their old siding! Woot woot, our property value increases without us having to spend a dime! Well it turns our very lucky neighbors has wood sliding underneath their old aluminum sliding so all they really had to tear down the old stuff, sand the old wood, and repaint.
I asked Brett if he thought we were lucky enough to have wood sliding under our aluminum sliding? His exact words were, "high doubtful." The good news is that we are lucky! I made Brett pry up a corner of the aluminum sliding and SURPRISE there was wood siding! The only portion of the house that does not have wood sliding is the addition to the house, aka our huge den at the back of the house. But in the grand scheme of things only having to wrap and re-side the back of the house is a lot easier than the whole house! I'm so excited!
Our second surprise is something we actually discovered a few months ago. When we were giving our bathroom a facelift I got a little sidetracked and decided to investigate the claim that there was hardwood floors underneath the upstairs carpeting.

I started by tearing back a corner of the carpeting and found linoleum. I'm not going to lie, I was pretty disappointed.

I then started picking at the linoleum and after I loosened a large piece and SURPRISE, I found the hardwood floors!


So sometime in the future, after we sheet rock the whole upstairs, we will tear out the carpeting, CAREFULLY remove the linoleum, sand and refinish the hardwood flooring. Add that project to the list!
Saturday, October 29, 2011
Before
It dawned on me that I've actually never posted most of our "before" pictures of the house. And you can't very well judge how wonderfully we renovate our house without the before pictures!
So here goes:
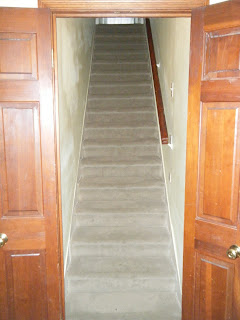 So this is the stairwell to the upstairs bedrooms. It kind of reminds of Home Alone when Macaulay Culkin gets banished upstairs for the night and subsequently gets left home alone! The plan is at some point to open up the right side of the stairwell to overlook the dining room. But that's like project number 1,987!
 Ok, apparently this yellowish mantle was originally blue, like bright blue...yeah thank goodness the seller's realtor has enough sense to repaint that before listing it! Can you imagine those burgundy bookshelves with a blue mantle?
You can't see it too well in this picture but the burgundy is actually painted on top of that wood paneling stuff that was popular in the 60's-70's. Wood paneling is a big pet peeve for me, I don't know why I despise it so much but I do! Therefore the plan here it to tear that out and sheetrock the bookcases and mantle. We'll then need to paint the mantle so it doesn't look so unfinished. I really thought this area was going to drive me nuts but I have to say since we put pictures on the bookshelves and the TV on the mantle, it's not really that bad.
 Here's the dining room and formal living room. There's not much to say about these rooms, they are a light rose color and there's nothing I really want to change here!
 The best part about the dining room, the built in China cabinet. I seriously love this thing, it makes me feel fancy! But see that green paint on the walls of the cabinet, the whole room use to be that color....wow! Does it make anyone else feel like eating a sour apple jolly rancher?! Again, thank goodness the seller's realtor has enough sense to repaint that before listing it!
 I really like this chandelier in the dining room but not really the green thing! That will be repainted, I promise! That will be the only change to the dining room.
 The front door - one would think there wouldn't be anything to change, but alas the handle and lock were incorrectly installed. Oh yeah, upside down to be exact! We discovered this little problem when we bought new hardware and tried to change the locks. Good news, my awesome husband is a jack of all trades and made it work! And those pink post its are all the outlets that Brett has to ground because only about 5 outlets in this house are grounded. That electrical engineering degree Brett has is looking better and better! Seriously, he's the best!
 Our formal living room, or the fancy room as I call it. And more outlets for Brett to ground.
 Here is the view from the front door.
 Here is the random hallway to the kitchen. The master bedroom and downstairs bathroom are off this hallway.
Side note, I love the detail work around the edges of the hardwood floors! Classy, right?
 This is where things get weird. See that open door on the left, that's the bathroom with slate flooring. Don't worry things will get weirder in a minute...
 And the "master bathroom," I know you're laughing! Ok, no natural light - not great, dark painted bathroom - that's BAD! Y'all some days I put make up on in here and get to work and realize I look like a china doll, no seriously it's bad! Back to the bathroom, white tile with black border and slate floors...not really sure what the plan was here but I'm going to assume it wasn't this. It's like a hodge podge of various styles. The plan here is to gut it and start over!
Hey - DIY network if you want a great episode of Bath Crashers, PLEASE call me!!! No, Seriously!
 Did I mention they painted over wall paper?
 The sink, cleaning this is the bain of my existence! And the bowl is so small. If you run the water for more than 15 seconds it's almost over flowing!
 This is the master bedroom closet. It's not ideal but we have more than enough space for all our clothes - well, actually my clothes, shoes, and purses.
 This is a cute little area at the top of the stairs - there is a bedroom on each side of this little playroom/sitting room area. The whole upstairs is wood paneling, acoustic ceiling tiles, and paster. The upstairs remodel is going to be serious undertaking. We are doing to tear down all the paneling, ceiling tiles, and plaster and then sheet rock. Don't worry there will be LOTS of posts about this project!
 I love this little cubby area!
 Here is one of the upstairs bedrooms. The rooms are actually quite big! Right now we have a queen size bed in one room and a king in the other and there's still tons of room.
 More pictures of the bedrooms. I'm not sure how I feel about these angled ceilings but I'm sure I'll get use to them.


 The back of the house. Look at those lovely awnings covered in mold - Brett has already taken on that project. A ladder, bleach, water, a hose and about 3 hours later they look as good as new!
 The outside of the house needs a little TLC. Residing is one the top projects on our list.
 The kitchen is in pretty good condition, of course I would LOVE new counter tops but these will suffice! And the tile backsplash is not my fave but it's definitely not bad to look at.
 More of the kitchen, it's so spacious. I love it!
 The laundry area leaves a little to be desired but it's functional. The plan here is to take out the accordion doors, sheet rock the laundry area, and install better doors.
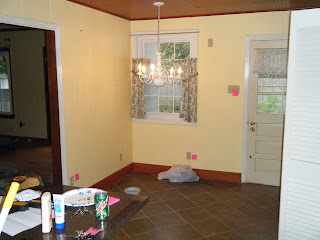 Our little dining nook area. We never use that door to the right of the nook area so we are contemplating tearing our the door and extending the wall and making a nice big bay window.
 And we are back to the living room! I love that bay window that overlooks the backyard, it's probably one of my top 5 favorite things about this house. The french doors are beautiful too, however they have rotted on the bottom due to a water intrusion issue we are trying to resolve so they'll have to be replaced soon.
And that's the Before! Stay tuned for the After!
So here goes:


You can't see it too well in this picture but the burgundy is actually painted on top of that wood paneling stuff that was popular in the 60's-70's. Wood paneling is a big pet peeve for me, I don't know why I despise it so much but I do! Therefore the plan here it to tear that out and sheetrock the bookcases and mantle. We'll then need to paint the mantle so it doesn't look so unfinished. I really thought this area was going to drive me nuts but I have to say since we put pictures on the bookshelves and the TV on the mantle, it's not really that bad.


Side note, I love the detail work around the edges of the hardwood floors! Classy, right?


Hey - DIY network if you want a great episode of Bath Crashers, PLEASE call me!!! No, Seriously!


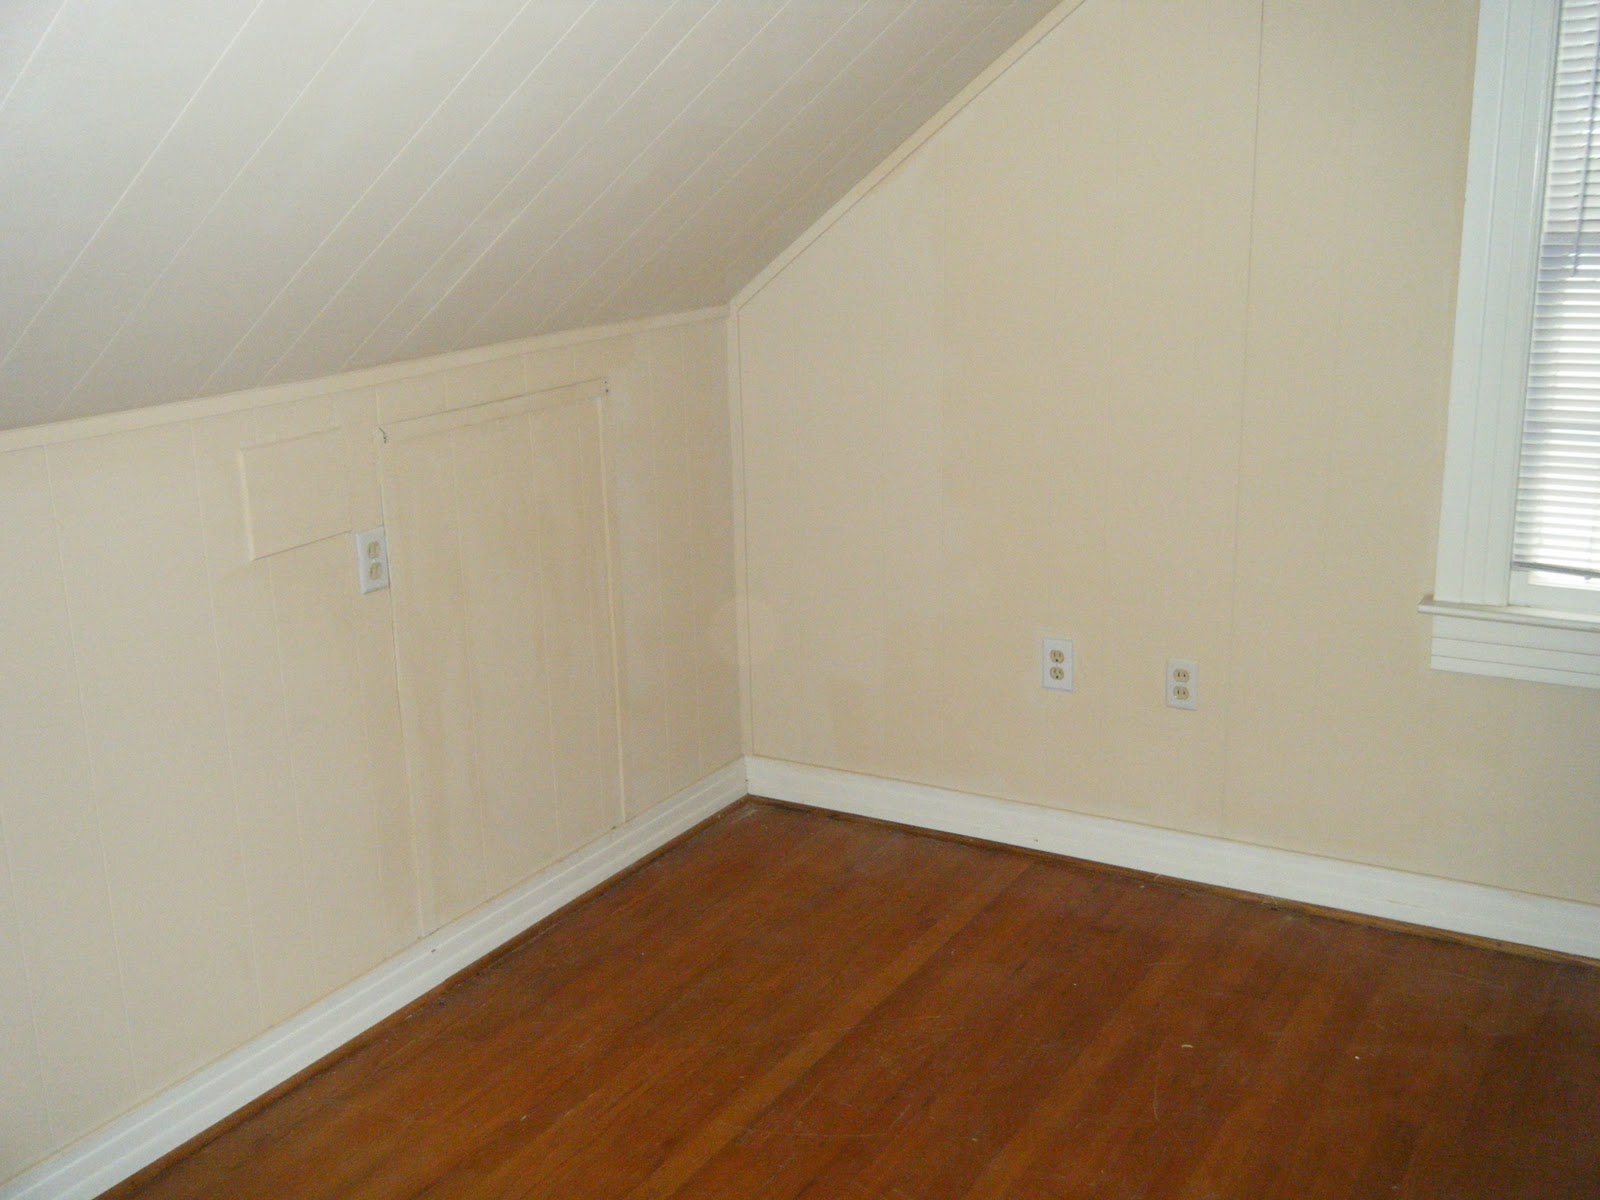


And that's the Before! Stay tuned for the After!
Monday, October 3, 2011
One Lazy Weekend
Last weekend started off slow. We took Shelby for a walk, I made a list of errands to run, washed windows, and Brett's only "big" project was to hang pictures inside the house and/or install outside motion sensor lights. I figured we'd divide and conquer the chores and have a nice relaxing afternoon.
After I got back from the grocery store Brett tells me he now owns a ladder. My response is the following string of questions: What happened? Did you go buy one? Did you break the one Wes let you borrow? Did Wes tell you to keep the ladder? Well you can imagine my confusion when the answer to all those questions is no! Brett being the resourceful/lucky individual he is actually found the ladder under our house. He then tells me, "You're really going to like this ladder it's an antique!" Not sure "antique" is really the key term one should use in describing a ladder. But he was right, the ladder looks surprisingly sturdy!
After I admired Brett's newest toy, I headed inside to unpack groceries. About an hour later I head outside to find this...

Brett has decided to dig out the tree root that is under the driveway and thus forcing the corner of the driveway to be raised about 4.5 inches. I still really don't know why he decided to take this project on but nonetheless it has begun. I think it all really started with curiosity and then he just couldn't stop digging! The theory was dig out all the tree root and gravity would take care of the rest and we would have a level driveway. Brett spent all Saturday and Sunday afternoon digging out the tree root. The neighbors came over multiple times to check the progress and were pretty impressed with his dedication.
I feel like the pictures speak for themselves.


The driveway has now settled about 2 inches and has about another 2.5 to go in order to be truly "level" but it definitely looks better! We decided to speed up the settling process by using a hose and a pressure nozzle to force some of the dirt under the driveway to loosen up and level itself.
We estimated it would cost about $7,000 to jackhammer and haul away the old driveway and pour concrete for a new driveway. This project's grand total so far is $37.18; $27.18 for the shovel and $10 for the pressure nozzle (plus Brett's labor, but he says he loves this stuff so we won't consider that a cost!) Not bad for a lazy weekend, right?

Brett has decided to dig out the tree root that is under the driveway and thus forcing the corner of the driveway to be raised about 4.5 inches. I still really don't know why he decided to take this project on but nonetheless it has begun. I think it all really started with curiosity and then he just couldn't stop digging! The theory was dig out all the tree root and gravity would take care of the rest and we would have a level driveway. Brett spent all Saturday and Sunday afternoon digging out the tree root. The neighbors came over multiple times to check the progress and were pretty impressed with his dedication.
I feel like the pictures speak for themselves.

 |
| You can see a little progress is made, a very small piece of the root is missing |
 |
| I TRIED to help, in a sundress and all! I get points for style, right? |
 |
| More progress, this is hour 3 of operation - Level Driveway |
 |
| I think he really just wanted to play in the mud all day... |
 |
| I had to walk with this mess to the hardware store to buy a shovel....Yes I know we are home owners we should already own a shovel. |
 |
| Shelby offering her assistance |
 |
| 4.5 hours into the project |
 |
| Now THAT'S progress! |
 |
| Shelby was very intrigued by all this bark that just kept appearing |
 |
| We don't even need to buy firewood! |
 |
| No joke, that's one piece of bark that we/Brett pulled out from under the driveway! |
 |
Everyone notice that car jack in the lower right of this picture...no idea what Brett was planning to do with it! Anyway, moving on...the next few pictures made me a little nervous mostly because I expected the driveway to slowly start sinking and leveling itself out. Thank god that didn't happen, Brett managed to dig out enough of the tree root that he was able to stick his entire arm under our driveway... |


The driveway has now settled about 2 inches and has about another 2.5 to go in order to be truly "level" but it definitely looks better! We decided to speed up the settling process by using a hose and a pressure nozzle to force some of the dirt under the driveway to loosen up and level itself.
We estimated it would cost about $7,000 to jackhammer and haul away the old driveway and pour concrete for a new driveway. This project's grand total so far is $37.18; $27.18 for the shovel and $10 for the pressure nozzle (plus Brett's labor, but he says he loves this stuff so we won't consider that a cost!) Not bad for a lazy weekend, right?
Subscribe to:
Posts (Atom)