Saturday, October 8, 2011

One room done, a few to go!

I've been feeling very accomplished this week. We finally finished decorating one room in our house and I have to say I think it looks pretty darn good! Honestly, it's been 90% done for some time but it took me about a month to finally hang up the pictures in the living room. 

So without further ado, here is our living room!


We already had the furniture, thanks to some hand me downs and the rug really pulled it all together. Brett has always loved the green velvet sofas, I was skeptical but they actually are pretty cool. I mean really, who has olive green velvet sofas?? And the rug, well it was a steal - to say we got a deal on it, is an understatement. It had been a special order item that was returned. When I first saw it I thought it was cool but I wasn't really sold. I mean I really liked it but I was definitely on the fence about "needing" it. Thank goodness for my amazing husband that told me just to buy it. I think he was trying to avoid what I call a non-buyer's remorse moment - you know when you see something you like and then you sit on it for too long...yeah that's non-buyer's remorse. And since we've already had a few of those moments he decided to preemptive move was needed.  

Here's a closer look at the rug, it's very different but it has a pretty cool color scheme!
 
Here was my previous non-buyer's remorse moment, an another awesome area rug. I fell in love with this one the minute I saw it but since it was a little out of my price range, I decided to stalk it on potterybarn.com until it went on sale. My plan failed, the rug sold out online before it went on sale. I was definitely bummed! Poor Brett had to hear about it for days! Then with a little luck our local store still had one in stock and thanks to a no sales tax weekend and 10% off coupon from Pottery Barn, I got my rug!

You'll notice Shelby has made the rug her personal toy and bone repository. I lost the battle of wills about this being a dog free rug. Yeah, who was I kidding with that idea?!

In other random news we finally got a flag pole for the front of the house. For some reason having a flag pole on the front of the house is one of Brett's favorite ideas. He even went to the trouble of finding this very fitting and festive flag for Halloween...


Monday, October 3, 2011

One Lazy Weekend

Last weekend started off slow. We took Shelby for a walk, I made a list of errands to run, washed windows, and Brett's only "big" project was to hang pictures inside the house and/or install outside motion sensor lights. I figured we'd divide and conquer the chores and have a nice relaxing afternoon.

After I got back from the grocery store Brett tells me he now owns a ladder. My response is the following string of questions: What happened? Did you go buy one? Did you break the one Wes let you borrow? Did Wes tell you to keep the ladder? Well you can imagine my confusion when the answer to all those questions is no! Brett being the resourceful/lucky individual he is actually found the ladder under our house. He then tells me, "You're really going to like this ladder it's an antique!" Not sure "antique" is really the key term one should use in describing a ladder. But he was right, the ladder looks surprisingly sturdy! 

After I admired Brett's newest toy, I headed inside to unpack groceries. About an hour later I head outside to find this...

Brett has decided to dig out the tree root that is under the driveway and thus forcing the corner of the driveway to be raised about 4.5 inches. I still really don't know why he decided to take this project on but nonetheless it has begun. I think it all really started with curiosity and then he just couldn't stop digging! The theory was dig out all the tree root and gravity would take care of the rest and we would have a level driveway. Brett spent all Saturday and Sunday afternoon digging out the tree root. The neighbors came over multiple times to check the progress and were pretty impressed with his dedication.

I feel like the pictures speak for themselves.

You can see a little progress is made, a very small piece of the root is missing

I TRIED to help, in a sundress and all! I get points for style, right?

More progress, this is hour 3 of operation - Level Driveway

I think he really just wanted to play in the mud all day...

I had to walk with this mess to the hardware store to buy a shovel....Yes I know we are home owners we should already own a shovel.

Shelby offering her assistance

4.5 hours into the project

Now THAT'S progress!

Shelby was very intrigued by all this bark that just kept appearing 

We don't even need to buy firewood!

No joke, that's one piece of bark that we/Brett pulled out from under the driveway!


Everyone notice that car jack in the lower right of this picture...no idea what Brett was planning to do with it!  Anyway, moving on...the next few pictures made me a little nervous mostly because I expected the driveway to slowly start sinking and leveling itself out. Thank god that didn't happen, Brett managed to dig out enough of the tree root that he was able to stick his entire arm under our driveway...


The driveway has now settled about 2 inches and has about another 2.5 to go in order to be truly "level" but it definitely looks better! We decided to speed up the settling process by using a hose and a pressure nozzle to force some of the dirt under the driveway to loosen up and level itself.

We estimated it would cost about $7,000 to jackhammer and haul away the old driveway and pour concrete for a new driveway. This project's grand total so far is $37.18; $27.18 for the shovel and $10 for the pressure nozzle (plus Brett's labor, but he says he loves this stuff so we won't consider that a cost!) Not bad for a lazy weekend, right?


Sunday, September 18, 2011

Forget the Clorox, Get the Sledgehammer!

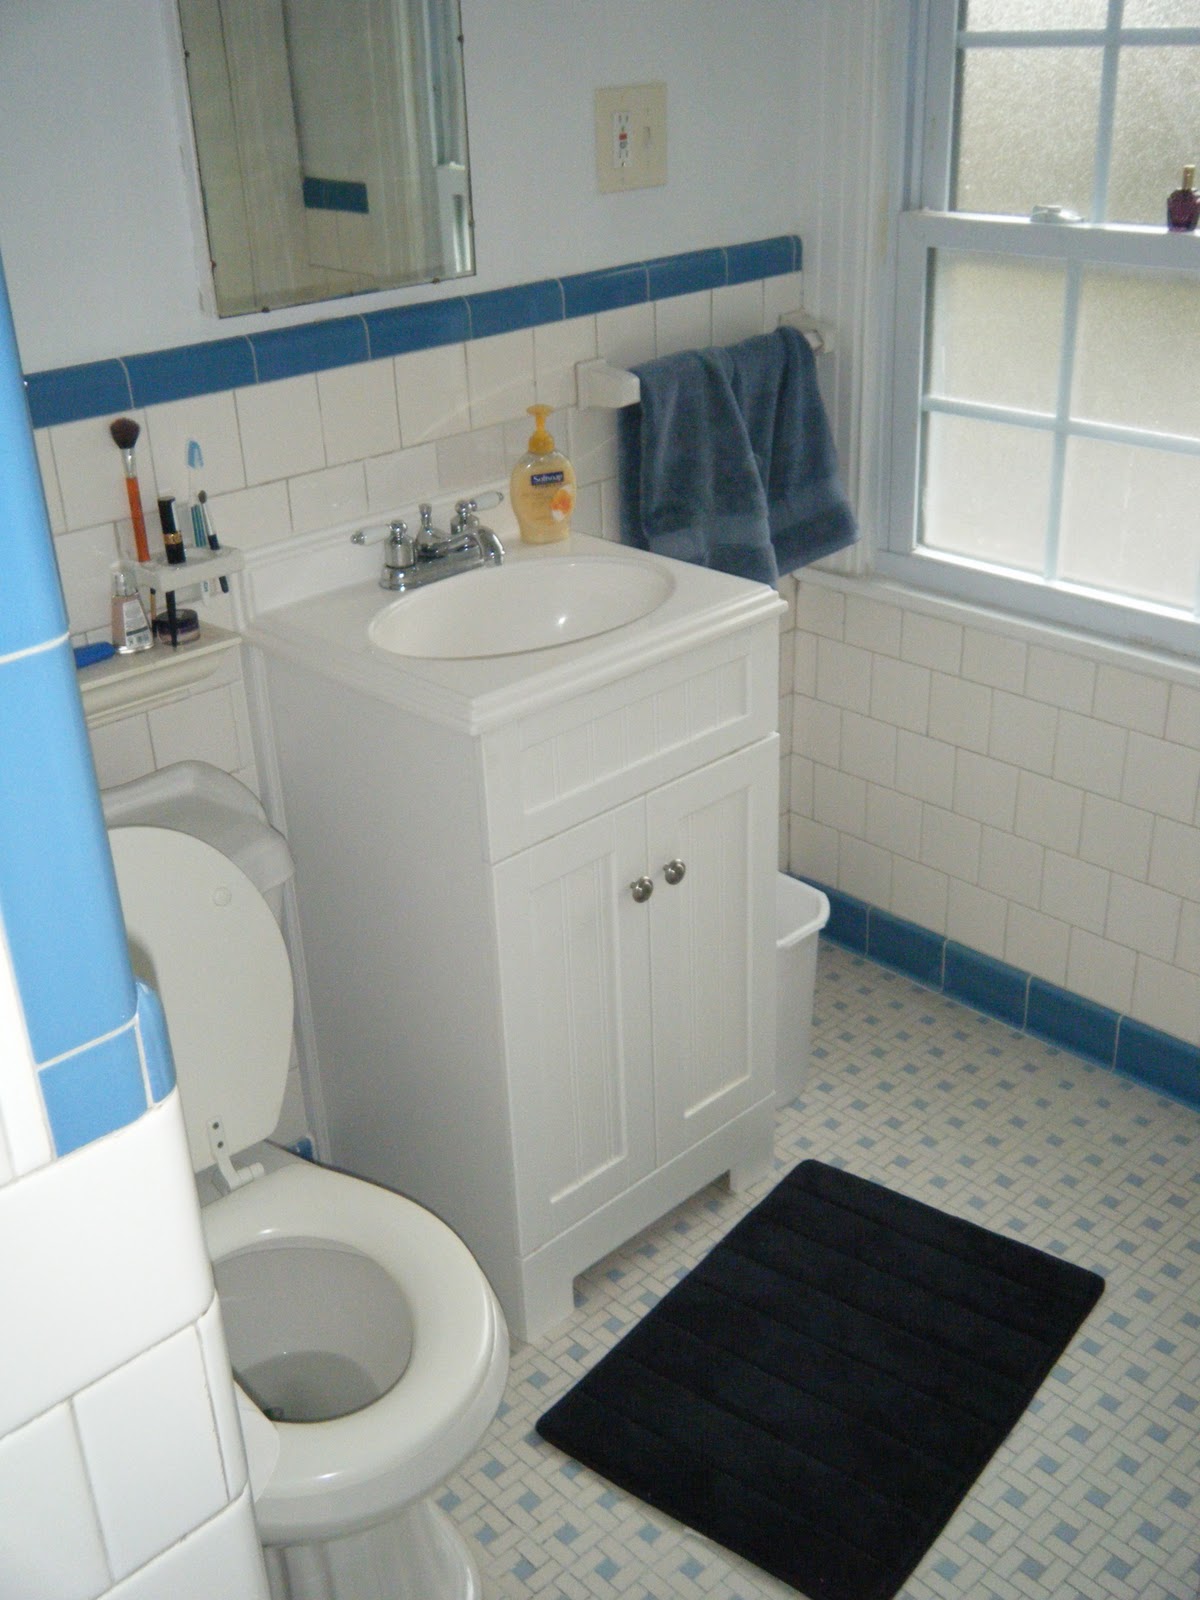
To say our bathrooms are outdated, is a serious understatement. When my brother in law first saw this bathroom his exact words were - forget the clorox, get the sledgehammer. This bathroom is straight out of the 50's, white tile with a blue tile border - tile, tile and more tile! Which to me means - scrubbing, scrubbing and more scrubbing! Judging by the condition of the tile when we started I'll assume it hadn't been cleaned in quite some time. The bathroom also has a really odd layout...as you can see from  some of the pictures.
The before...


Remind anyone of a dorm shower?


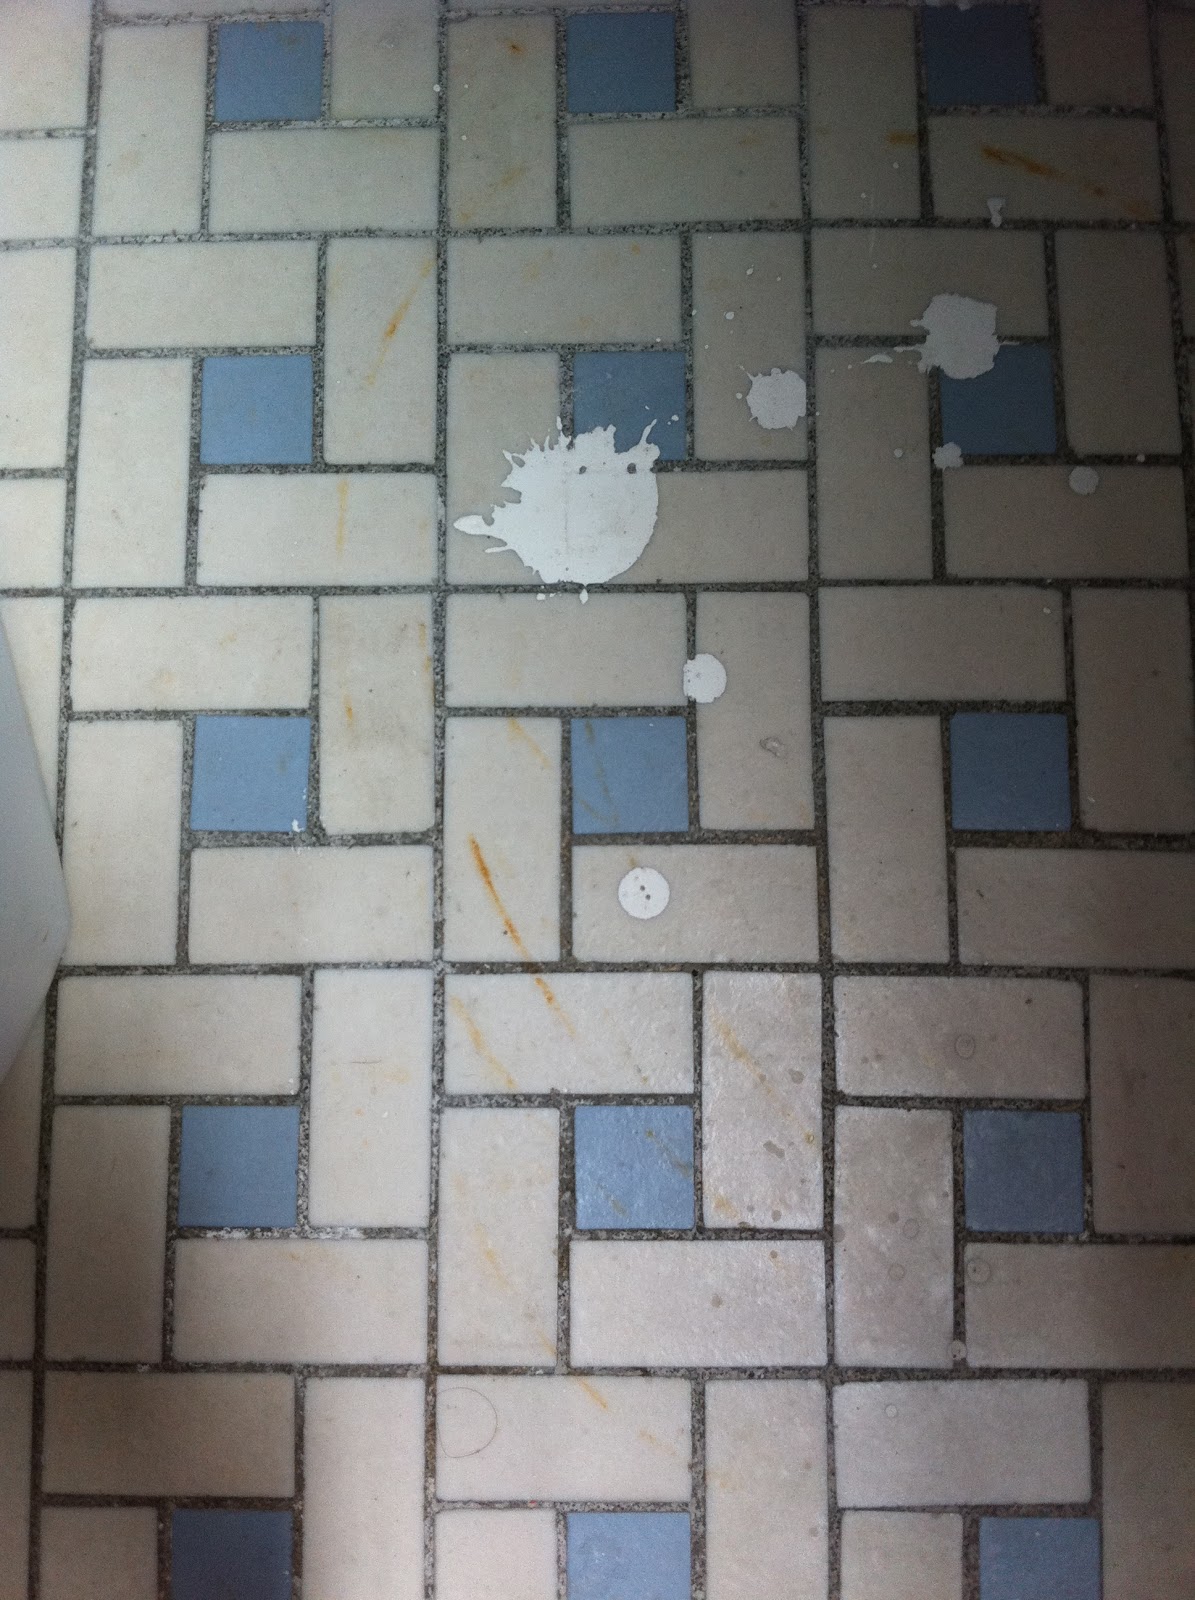
The plan was to take the bathroom down to the studs, change the layout of the bathroom, and completely update the bathroom. Well, some of our New Orleans friends convinced us to give the vintage look of the bathroom a chance. I caved and said we'd give the bathroom a facelift and then if I still hated the bathroom we would demo it. So the scrubbing commenced, we used a combination of comet, bar keepers friend (this stuff it awesome, cleans and polishes everything!!) and very abrasive sponges.

Bar Keepers Friend removed these paint and rust stains, this stuff is seriously awesome.
I'll be honest, I was dreading the scrubbing this bathroom. So much so that I was willing to demo the bathroom before cleaning it, crazy right? Well I was pleasantly surprised when it only took a a few hours. I had my doubts but once we were done scrubbing the tile the bathroom looked SO much better. Pictures really don't do it justice, I swear!  
So shinny and clean!


With the tile nice and clean we decided to tone down the color of the bathroom by just painting the walls white. The verdict is still out on if the walls will stay white or if we'll paint them a very pale blue or like a blue frost color. 

This is how you spend your Friday night's when you're doing home renovations...

And here are the white walls. So much better, right?


With clean tile and newly painted walls it was finally time to accessorize! We originally wanted to go with a seersucker theme for the bathroom but we couldn't really find a seer sucker shower curtain we liked (and that was affordable!) We finally ended up at pottery barn kids torn between a Very Hungry Caterpillar shower curtain or a blue patchwork shower curtain. I REALLY wanted the Very Hungry Caterpillar one but when the woman asked me how old my kids were I decided maybe I needed to go with the less child-like shower curtain. 

We still have some pictures to hang up but it really is amazing what a little elbow grease and paint can do!

The after...


Monday, September 5, 2011

Because Every Great Porch Needs Adirondacks

Our house has an amazing porch! No seriously, the porch was probably the selling point. The rest of the house was like the free gift with purchase. The porch came with an awesome swing too! The swing is seriously so relaxing, well as long as it's not unbearable hot! We had talked about getting some more furniture for the porch but it wasn't really top on the priority list. You see I have this crazy prioritized (and overly ambitious) list of home improvements/furniture purchases however we never seem to be able to stick to this list and thus we now have Adirondack chairs.

My husband has always been a fan of Adirondack chairs and from time to time we priced them out, but again it wasn't on the top of the priority list. I'm always up for a bargain so when I was shopping at World Market one Saturday morning and Adirondacks chairs were 50% off, they rose to the top of the priority list! We MAY have gotten carried away with our purchase but they were 50% off! We bought four chairs, two stools, and two baby chairs. My husband couldn't resist the two baby adirondack chairs, they are prefect size for our two fabulous nieces! Aren't they adorable?!

Getting the chairs home were quite the ordeal, fitting six boxes in a sedan was a challenge and the rain only added to the fun! Once we got them home assembly was pretty quick, of course I took the supervisory role as Brett put all the chairs together!


Shelby helped supervise as well!

Great price and only a couple hours of assembly and voila! Our porch is complete, onto the next project/purchase!

Sunday, August 14, 2011

The Perks of Buying a House

A few weeks after we closed on the house I came home and found a package from Wells Fargo on our doorstep. I figured it was more disclosures, our property appraisal, or one of the thousand other things I had to sign during the home buying process. But I was pleasantly surprised when I opened the box to find this...

Thank you Wells Fargo! Apparently when you borrow a few hundred thousand dollars from a bank the least they can do is send you a bottle of wine!

Project 1: Microwave

The first thing I've learned about home ownership is the overwhelming feeling. It's easy to think of all the fixes, projects and changes you'd like to make. Unfortunately for us, Brett and I both have full-time jobs and a budget to adhere to. So it's time to prioritize! While I can still rattle off about 30 projects I'd like to tackle (this is where the overwhelming feeling sets in!) we NEEDED a microwave! Thus project Number 1 for our household is installing a microwave, woot woot!
I'm a big believer of the built in microwave for many reasons but the most important reason being, it saves valuable counter space. Since our kitchen came with no microwave (don't worry it did come with a wine fridge) I got to choose the exact microwave I wanted. I researched, shopped and priced out all our options. In the process I learned something very interesting, the space above our stove was 36 inches wide and as luck would have it most microwaves, at least the affordable ones, are 30 inches.  You can buy extension pieces, which are essentially just 3 inch stainless steel pieces that can be installed on both sides of the microwave to cover any gaps between the cabinets. But it turns out the extension pieces are almost as much as the microwave! Yikes! We decided to create our own trim pieces and still purchase the 30 inch microwave.

So...onto the installation! We started off by ripping out the old hood vent which was super easy! Turns out that the demo part is much faster than the installation/rebuild! In our microwave research we learned that we needed a space of 30 inches between our stovetop and the top of the cabinet and the cabinet needed to be at least 66 inches from the floor.

Drawing is courtesy of the handy dandy Frigidaire Installation book.

We knew going into the project that our space didn't really fit those dimensions, we had about 28 from stove top to cabinet and 64 inches from floor to cabinet. Our solution was to adjust the height of the cabinet. Simple, right? Not so much. If you adjust the cabinet height then you have to adjust the size of the doors if you plan on replacing them. And with the detail the cabinet doors have it just may not be worth the effort. We decided instead to keep the cabinet sans doors, my idea is to make it a cook book shelf. Maybe a good idea, maybe not but we'll see. Overall we took 3.5 inches off the cabinet. It wasn't easy mostly because whoever installed the cabinets stripped the screws when the cabinets were installed therefore we had to get creative and cut the cabinet while it was still hanging. See below...


Look at that focus! Once we got through the obstacles of using a saw to cut a cabinet without damaging the others, things started moving! With the cabinet height now corrected we reinstalled and reinforced the bottom of the cabinet. We also learned that we need a better drill! The next step was to patch the hole that use to be the hood vent. Because we adjusted the height of the cabinet we weren't able to reuse the vent from the old hood. We decided the easiest option was to allow the microwave to vent back into the kitchen (this decision may not have been the best however it was 11pm on a Monday, I was irritable and tired!)
Here's our beautiful patching job...


After patching the wall we needed an electrical outlet for the microwave to plug into. Luckily I married an electrical engineer who knows how to do things like install a junction box, install and ground an outlet. Power source - check!

Next we had to cut part of the tile to mount the bracket that the microwave would rest on. Valuble lesson learned here, any time you cut tile cover everything you don't want covered with a fine layer of dust! Suffice it to say there was a plume of masonry dust floating in my kitchen. Once we cut the tile to make room for the bracket (and cleaned up the dust) we installed the bracket.


It took a couple tries at it but we finally go the bracket installed correctly and it was time to mount the microwave. We had a few ill fated attempts at getting the microwave into the bracket but around the 4th attempt we got the microwave locked correctly in place. The last thing to do was to mount the top of the microwave to the bottom of the reinforced cabinet using screws. This is when I realized we really absolutely definitely needed a better drill! A couple screws that should have taken not 2 minutes to get in took 30 minutes of me holding a 100lb microwave in place...not fun. But we survived and have completed our first of 30-ish home improvement projects ahead of us!
Check out our almost finished work!


Moving is....fun?!?!


It seems like everytime we move we say "next time we'll use movers"....well I think after this move we REALLY mean it! Or at least I really hope we mean it! It has become a trend for us to only move during the summer which makes an already exhausting chore even worse. I realize we were extremely lucky at we only had a 1.25 mile move but nonetheless packing all our stuff (and the physical move) is still exhausting. Being that my husband and I just recently got out the of whole "move every year" phase of life we don't have too much unnecessary baggage, however since we did just get married we have all those wedding presents to move. I must admit I was DREADING the thought of moving everything but thanks to a little planning I managed to save a lot of the original boxes presents came in!
Anyway on to the good stuff...the move! On Saturday we showed up at U-Haul at exactly 11 am to get our moving truck much to my surprise it was actually ready on time! And so the moving commenced. After 2 trips with a FULL 17 ft U-Haul, the only things left to move were my husband's garage stuff including the most impressive collection of power tools you've ever seen, car jacks, miscellaneous car stuff, and my husband's prized possesion, his Green Egg Table. For those of you who don't know, a Green Egg the most amazing grill/smoker ever! No, seriously! It's amazing, it's only flaw it's about 250-ish lbs (or at least it feels that heavy). That's just the egg, that's not including the built-from-scratch table my very handy husband built to set his Green Egg in. The table is probably another 250-300 lbs. We decided to cover the entire table in slate, in hindsight we should have considered the weight thing. Needless to say this table is on wheels! As we load up the truck for the last load my husband realizes the table is 3 inches too wide for the U-Haul's ramp....lovely, right? Well after trying to MacGuyver a ramp for about an hour my husband discovered if he used his ATV jack to jack the table off the ground he could then change the wheels on the table from the outside to the inside thus making the table narrow enough to push up the ramp. After the switch was complete it still took my husband, my dad, and my brother-in-law to push the table up the ramp! We finally finished loading the truck waved goodbye to the house we had as a couple and headed for our new home!
Here's what I thought our Green Egg Table would look like...

And here's our infamous Green Egg Table, it's a little different but, hey, it has more character (blood, sweat and tears as well).